
Without money for an ALiner, or, let’s be real, even a hitch to allow the Outback to pull one, the single cheapest way to get up and running and creating the anaprim-modusVivendi content is getting the camper shell fixed and emplaced on the bed of the pickup. (Which is more than capable of pulling the existing ancient trailer too; but here before the beginning that’s getting ahead of myself).
What follows is an infodump about some resources I’ve looked at for doing so.
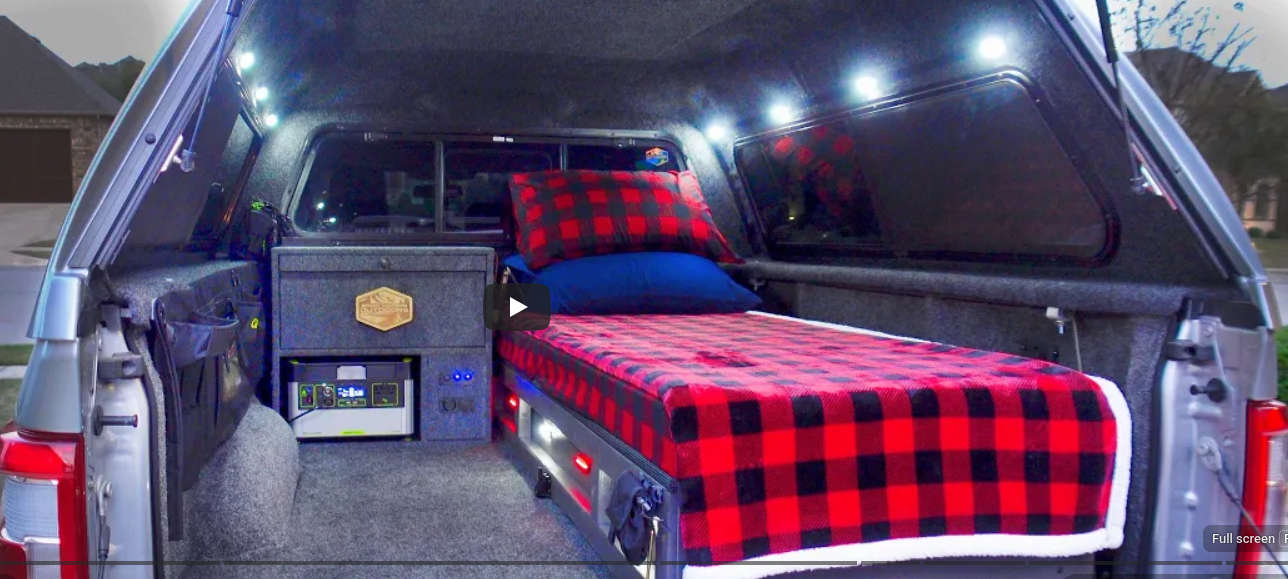
Ford F150 Truck Camper : Full walk-through and tour
I Built the Ultimate 8-Foot Bed Camper Starting With a $100 Cap
Camper Shell Leak Fix–Seal Windows and Bed the RIGHT Way
Truck Topper Painted With Bedliner Long Term Review
How to insulate, carpet, and seal windows in your truck cap!
HOW TO REPAIR TRUCK TOPPER WINDOWS Reseal Leaky Fiberglass Camper Shell
From Lumo’s take:
The first thing, the hard thing, is to replace a couple of cracked or missing (plexiglass/acrylic or Polycarbonate/Lexan) windows. (“Use butyl rubber tape around the perimeter before reinstalling windows. It’s like plumber’s putty but stays flexible forever.”) (“Order from McMaster-Carr or OnlineMetals — they cut to spec”)
And to verify how useful the back door of the shell will be (completely putting aside for the moment the question of whether to remove the rear pickup window and be able to wiggle into the cab from the shell).
With that all theoretically solved, the subsequent thing is what to layer down over the floor, sides, roof, and exterior of the shell. Here in no particular order are some of the options:
Bedliner coating (Line-X, spray-on polyurethane)
“XPS” Foam board up to 2″ (extremely insulating, R-8 to R-12)
Reflectix bubble foil (probably for the windows, and removable, but also can function as Interior vapor barrier)
Window screens and/or a ‘fantastik’ fan, the latter of which brings up the issue of electrical rough-in: “Run 12V wiring channels before closing walls. Even if you only install lights now, leaving conduit lets you add outlets/solar later without tearing out paneling).
Carpet
Tarping, as a basis for either creating adjacent sheltered ‘awning’ rooms, a whole rolling ‘garage’, or both, especially on trips of a week or more)
Post layering, installing some form of sleeping platform at least
Bedliner Application Sequence
If you see structural cracks, patch with epoxy fiberglass filler before bedlining.
Pressure wash entire interior/exterior, let dry 48+ hours
Sand down glossy spots for adhesion (220-grit)
Mask off windows (if installing new ones first)
Apply in 3 thin coats rather than 1 thick coat — prevents drips and ensures coverage
Cure time: Minimum 7 days before sealing or painting over it. A mid-tone gray or tan balances solar gain better than black, and matching white should also be considered.
Structural Considerations
If you’re mounting a heavy door/hatch assembly to the back:
Reinforce mounting points — Use backing plates or distribute load across 2–3 frame rails
Check hinge rating — Garage-door hinges are rated for 200+ lbs; ensure yours can handle wind loading
Strap/latch redundancy — At least one primary lock plus a backup safety strap
Wind profile — A tall open hatch catches crosswinds; consider a fold-down flap option
There’s also the issue of how it locks, probably necessitating rekeying (“repinning the cylinder”)